|
If your are missing being out in the garden here is something fun to do that keeps you in touch with your green thumb. Even though the the ground is frozen you can get an early start on your garden. When I first heard of Winter Seed Sowing it was pretty simple. You wait until early January to do this. You take a old Kiddie pool poke some holes in the bottom, fill the bottom with about 2" of soil throw some old leftover seeds in water, and cover with clear plastic. You leave it out in the back yard and the concept is after freezing the seeds will come up when they are supposed to. I have done it for fun in the past and it worked Ok for what it was. This year I am going to be a little more organized in the way I do my winter seed sowing. I am using milk jugs as mini greenhouses to sow in. As a rule of thumb you can do this with any seed that will grow in your zone. sometimes seeds can also sprout during some freak warm spell between weeks of frigid conditions. This is not a problem for perennials and hardy annuals. But if this happens to tender annuals you may need to cover them with a blanket on chilly nights. Hardy plants to sow in January and February are perennials and vegetables like Spinach,Kale,Brussels sprouts, Peas, Broccoli, Thyme, Sage, Oregano, and Cilantro. In March Tender Annuals, Vegetables & Herbs Lettuce, Bok Choy, Beets, Carrots, Basil,and Parsley. In April Tomatoes, Eggplant and Peppers. Check out these simple instructions below. Use good weed free soil, and once the plants are large enough take them apart and transplant into your garden. Happy Gardening 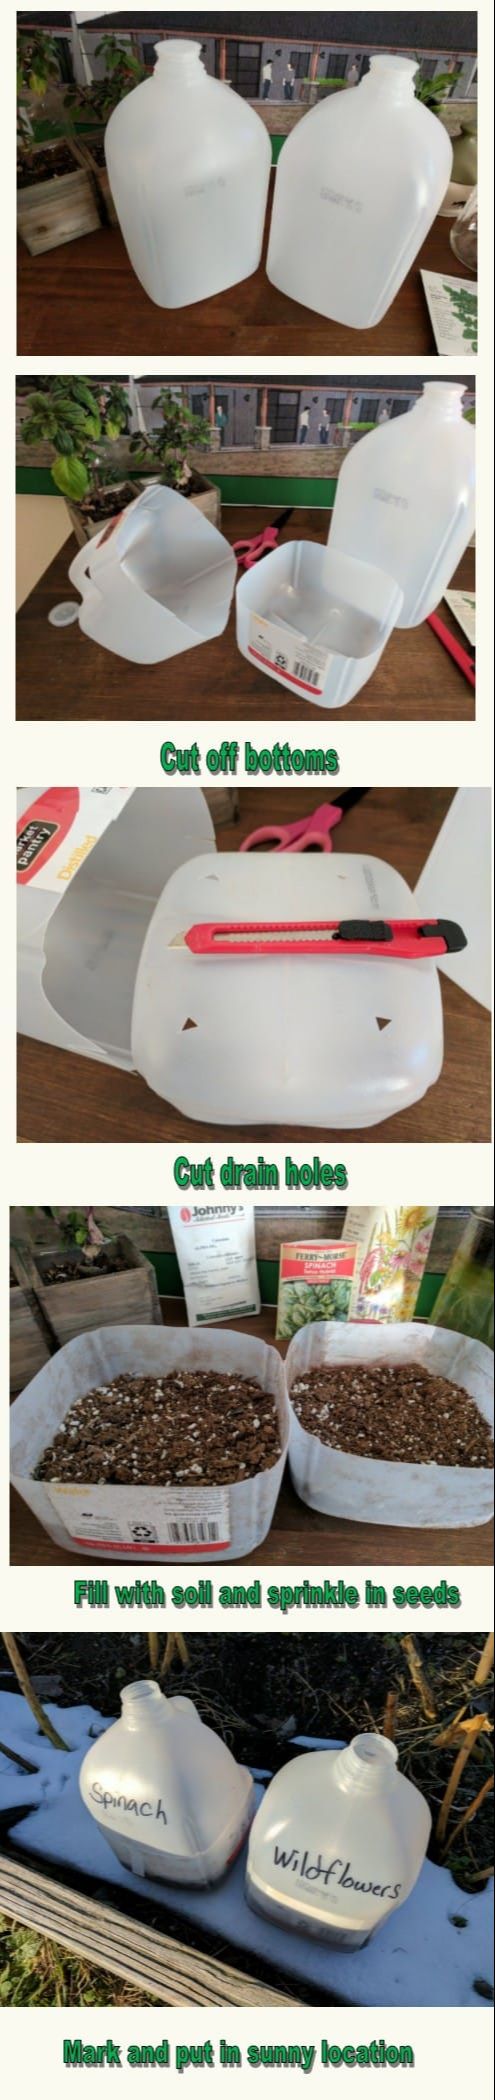
2 Comments
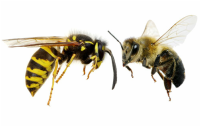 Photo by http://www.about-bees.com/ Photo by http://www.about-bees.com/ This is the time of the year that our ever peaceful Honey Bees take a bad wrap for their not so friendly cousins the Yellowjacket Wasp. There are some very clear differences to look for. Yellowjacket Wasps are skinny and shiny (no noticeable hairs). Eat other insects (soft bodied caterpillars, and spiders) and are beneficial predators. Wasps are carnivores and may be attracted to meat at your picnic. They also are attracted to sweet soft drinks. Honey Bees are fatter, and appear fuzzy or hairy. Bees eat pollen and nectar from flowers and are beneficial pollinators. Bees do not eat meat and are not attracted to your picnic. They generally are not attracted to soft drinks Yellowjackets are one type of wasp. They live in a social colony and the nest looks like a greyish paper carton. Yellowjackets usually nest underground in an abandoned rodent burrow and are readily seen flying in and out, especially if you run your lawn mower over the opening of the nest. If they are living in the wall of a house, you will not see the paper nest, but you will see them flying in and out. Yellowjackets have an annual colony, meaning the entire colony of wasps will die off after two hard frosts. Colony populations will range from a few dozen to a few hundred individuals. Only new queens survive the winter by hibernating underground. The queens will establish new nests in spring and will not reuse the old paper nest. Yellowjackets have a smooth stinger, which means they can sting multiple times, and do not die after stinging. There is no stinger left behind at the stinging site. Yellowjackets do not produce or store honey Honey bees are one type of bee. They are orange-yellow, gray or brown and black banded, and fuzzy. They are also social and the nest is constructed of beeswax. Honey bees nest in a beehive, a cavity of a tree, or sometimes in the wall of a house, where they can be seen flying in and out. They do not nest in a hole in the ground. Honey bees form perennial colonies, meaning the entire colony of bees can survive the winter, clustering in the nest and producing heat by consuming stored honey. Honey bee colonies have much larger populations, often approaching 30,000+ individuals at the height of the summer season. Honey bees can sting only once and die after stinging. The stinger and poison sac are often seen left in the skin at the sting site. Honey bees are the only type of bee that collects large amounts of nectar and pollen from flowers to store in the nest, to use as food during the colder times of the year. So do Honey bees or Yellowjackets in your home? If you have yellowjackets, rest assured they will be gone after two hard frosts. If they are not bothering you, ask yourself if you can live with them and appreciate them as beneficial predators. If you cannot live with them, you may need to exterminate them. If it is late summer or fall, keep in mind the colony has been growing there all season, and if they have not bothered you, they likely won’t start. If you have a honey bee colony nesting in the wall of your house, ask yourself if you can live with them and appreciate that they are beneficial pollinators. If you cannot live with them, you will need to try to locate a willing beekeeper and contractor for removal options. In most cases, there is no easy or inexpensive solution to removing a honey bee colony from a house, as de-construction is necessary to open up the wall cavity to remove the bees and wax combs. If it has been determined that the honey bees must be removed, the best time to do so is often in late winter or early spring. The reason for this is that by that time of the year, the bee population is often at its lowest point, meaning fewer bees to deal with. Also, much of the stored honey will have been consumed by the bees over winter, so there will be less honey in the combs to deal with. Often the bee colony will die over the winter, usually due to insufficient population to maintain adequate temperature for the bees to survive; insufficient reserves of honey, so the colony starves to death over winter; or the colony succumbs to parasitic mites. In all of these cases, it is much easier to deal with the remaining bee less combs, as the bees will have perished, making removal much easier (no stinging insects to protect the nest!). It is not a good idea to just plug the entrance hole of an active honey bee colony in this type of situation. Once the bees can’t get out and die in the wall, there will no longer be temperature regulation of the nest cavity. This in time may result in the melting of the honey comb, and the leakage of honey down into the wall, which will attract other insects and possibly rodents. There will also be developing brood or baby bees in the comb which will also die, leading to bad odors and attraction of other scavenger insects and pests. Some tips to keep Yellowjackets away from you house or picnic. Don't leave rotten fruit or meat outside. Keep garbage can lids on and keep cans clean inside and out, and bag garbage. Wipe down picnic tables after eating on them so Yellowjackets are not attracted to them. Just last week, I was picking up a few items at a local farm store, and I noticed they have their live chicks in stock already. For me, this is just a bit early but it made me think it’s a good time to start thinking chickens. We have about 80 chickens at home and have had for several years. We really enjoy the varied personalities of our flock.
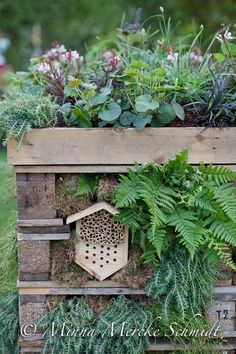
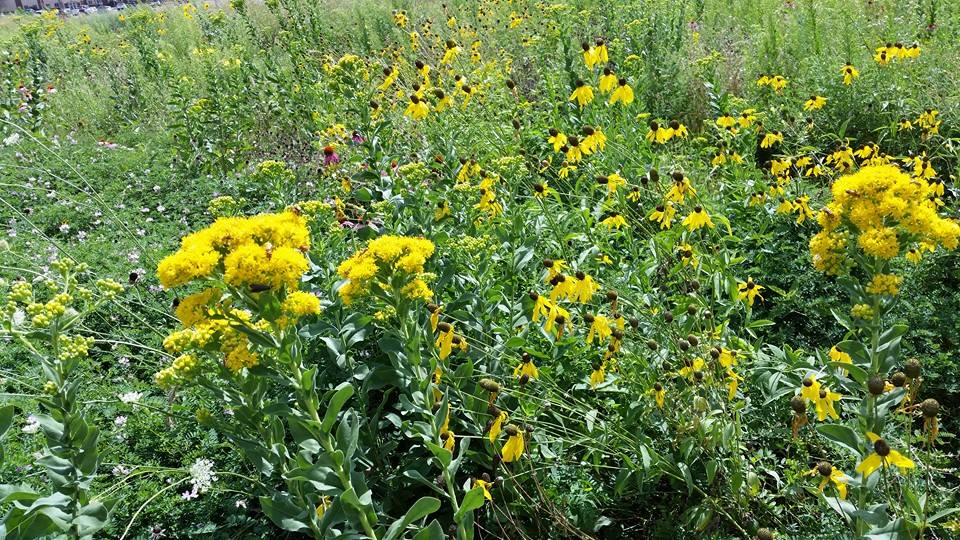
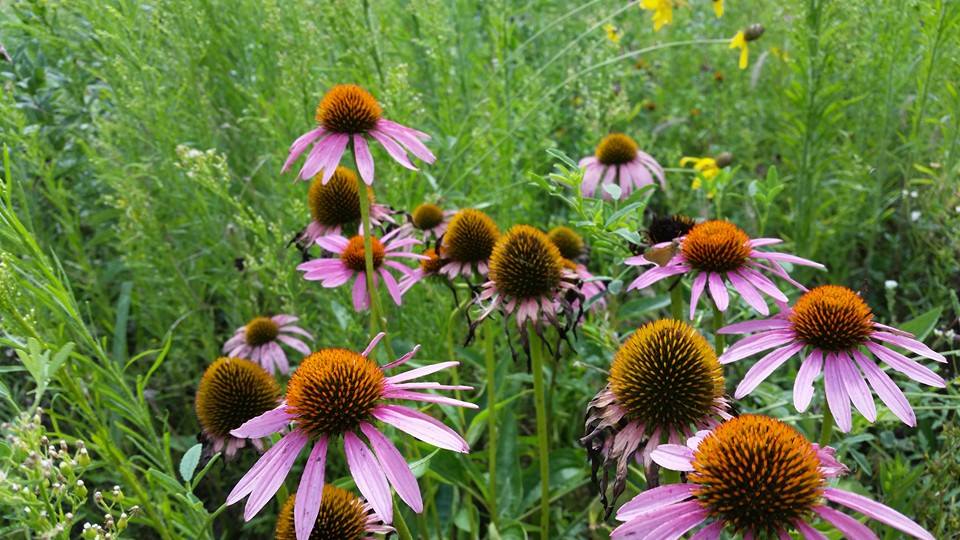
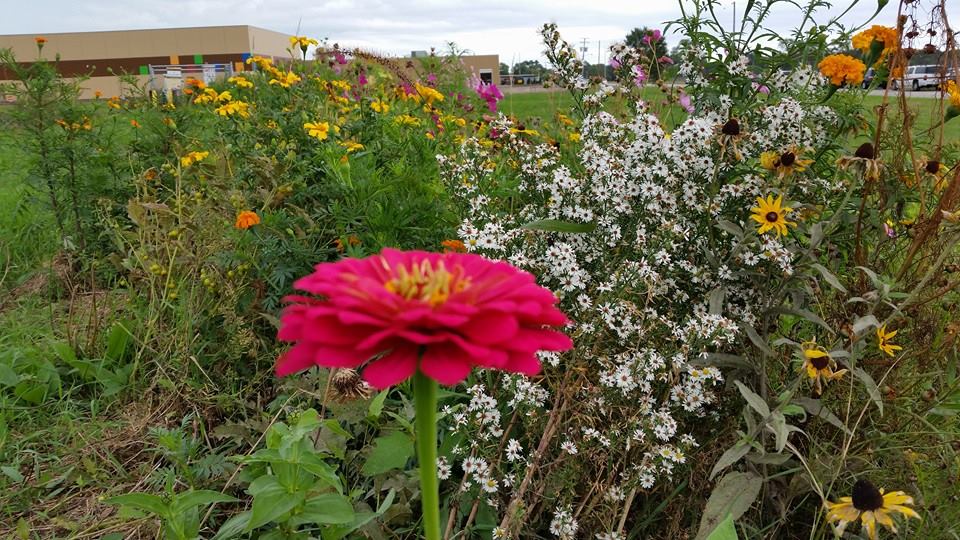
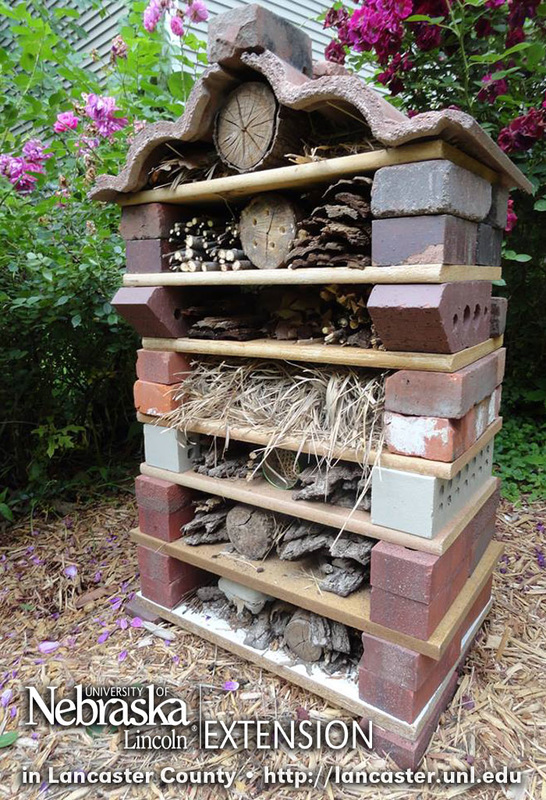
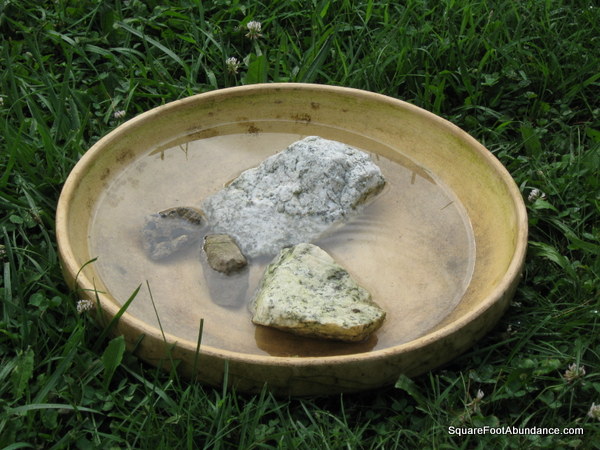
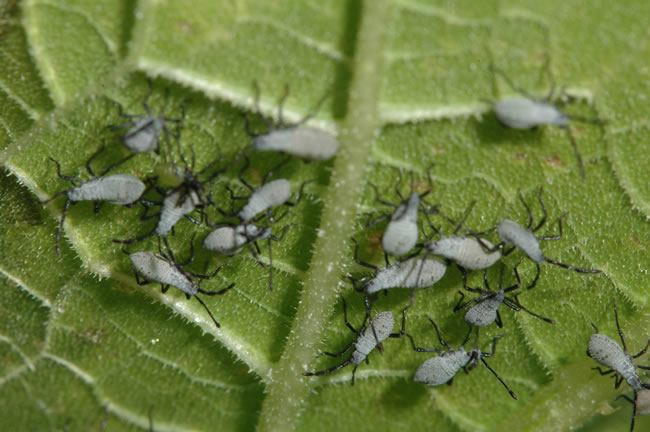
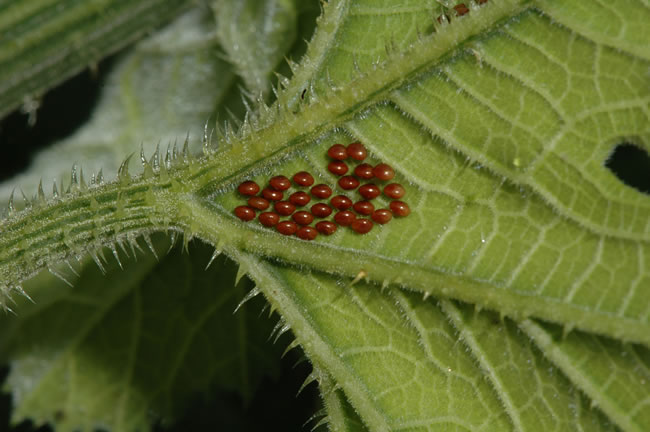
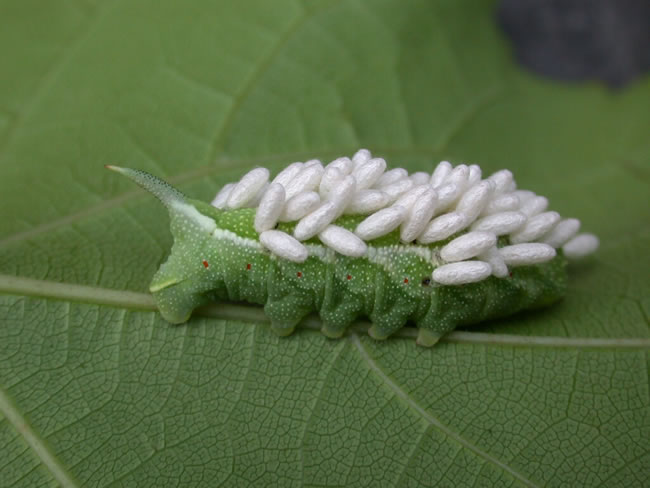
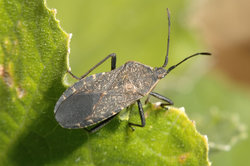
A few years ago, in South Bend, when they were considering an Urban Chicken Ordinance we were asked to teach some Chicken classes. Of course, I studied up on my chicken facts. I always like to make sure what your farmer - neighbor tells you is, indeed fact. Since then, we have been teaching about the care of chickens in urban settings for Unity Gardens. During the summer, we even have Unity Gardens’ chickens at the LaSalle Square Unity Garden! So why have Chickens? For us, it is a few different reasons the best one being is they are fun pets. Of course, it also has to do with education; knowing where your food comes from and understanding the interdependence within nature. If you have ever seen pictures of caged chickens you know what I mean. Fresh, free range eggs from your own chickens are much better quality in many ways. If you are a gardener you also know the benefits of chicken manure in the garden. (Make sure to age or compost it.) Chickens can help weed and feed the garden! Before you put chickens into your garden, I like to point out that chickens will also eat your garden. They are great in the garden at the start of the season before you plant, at the end of the season to do clean-up, or during the growing season if you contain them to areas you want weeded. Once you decide to have chickens, there are some basic things you need to get started. First, check the laws where you live to make sure you are allowed to have backyard chickens. If so, you need to first consider safe housing for your chickens. The coop is the chicken’s home. It is where they sleep, lay eggs, and hang out on rainy or cold days. The size of the coop needs to be at least 3-5 square feet per bird according to the University of Minnesota Extension. Your birds will need some basic things in the coop. In order to keep their feet healthy, they require something to perch on; ideally something square that is about 1-1/2 – 2 inches in size. Chickens also need nesting boxes; at least one box for every 4 or 5 chickens, but not less than 2 nesting boxes. There are all sorts of nesting boxes; store bought or homemade. Regardless of which you prefer, it is best to stop at the farm store first to look at what they have and design yours similar to the store bought ones. If you are building your own coop, keep in mind chickens poop on everything! Make sure you incorporate that in your design. Most store bought coops have removable trays for cleaning. As far as flooring goes, a dirt floor with fencing underneath to keep predators out, or a washable tile floor also work well. The coop needs to be predator proof. Raccoons are a real threat in urban areas and they are crafty. A simple latch may not keep them out. There is some more great info on the website backyard chickens regarding chicken coops. The next area to focus on is the run. This is the outdoor area where your chickens hang out all day. The bigger the better! But it is even more important to make the run predator proof. Raccoons and hawks can be a big threat so keeping netting or chicken wire all around, but even on the top helps. With this in mind, the chickens need as much diversity of forage space as you can give them. You will see your chickens looking for bugs, greens, and grit (tiny stones). Chickens do not chew; they grind up food in their gizzard with the grit they pick up. A moveable coop is a good option to keep their area full of fresh greens. Purchasing your chickens is so much fun, but there is a number of considerations. You can buy chicks and chickens online or you can go to a local farm store like Matthy’s Farm Market, Rural King, or Tractor Supply Co. in our area. If you order online, your chicks will come in the mail. You will want to get them out of the packaging as quickly as possible and feed them sugar water in a dropper. New chicks without a mother hen do not know how to eat and this will get them started and energized. Keep baby chicks contained indoors with a heat lamp and sturdy box with wood shavings in the bottom. Chicks need the temperature to be around 80 to 90 degrees. If you notice them huddling below the lamp, it may not be warm enough. Initially they need chick starter feed and fresh water. There are specific feeders designed to assure the babies do not drown, or some people use marbles in a dish of water. Picking chicken breeds can be fun also. What type of bird do you want? One of the most important characteristics is winter hardiness. Besides that, personal preference is your guide. Chicken breeds vary in many ways; meat chickens verses egg layers, egg color and size, bird size, and even temperament. Gently handling birds from and early stage will make most breeds a friend for life. Here are the top five chicken varieties: Rhode Island Reds: These classic hens are a dual-purpose breed; they are both proficient egg layers and the males are large enough to eat (meat birds) Barred Rock is the name of a particular color pattern in the Plymouth Rock breed. These black and white birds are another dual-purpose breed, very hardy and a steady egg layer. They are known for their docile personality. Americana’s have been dubbed “Easter Egg Chickens” because of their lovely eggs, which have shells colored various shades of blue and green. Leghorn hens, a breed originating from Italy, are possibly the best chicken to have for overall egg production and efficiency. Orphington chickens hail from England, and are another dual-purpose bird as they get large enough for meat purposes but also produce friendly hens that lay brown eggs in abundance. Depending on the breed, chickens will start laying in about 6 months. They can produce about 270 eggs a year in their prime under good conditions. After they are about 2 years old, they will decline in production, but will still produce. Slowly they will stop producing but can live for several years longer. Eggs are laid as part of the normal chicken ovulation cycle, so they do not need a rooster in order to produce. Once the chicks are feathered out and the outside temperatures are warmer, (mid-May), you can move them outside for the day, then longer as night temperatures remain consistently warm. This will help get them used to foraging. As they progress to adult feed, a good layer feed will get them what they need. This is especially important if you do not have ample space for them to roam in. You can add some cracked corn and food scraps as treats. They should not be fed meat, junk food, avocadoes, potatoes, and citrus fruits. Chickens can be fun for the whole family, and they are comparatively inexpensive to keep. There are several websites that make good resources, like backyard chickens or your local extension website. Also watch Unity Gardens website for upcoming chicken classes! www.theunitygardens.org  For years " Gardening 101 " meant Rototill your garden, rake it out, plant rows of your favorite vegetables. The next year repeat the same thing all over again. Farmers do the same thing on a larger scale. As urban area grew we removed the native flora and replaced it with grass which in my book has no value to our ecosystem but its pretty. We cut down native trees and imported flowering trees from other countries that just did not belong. The result was a shift in the balance of our ecosystem. Native trees and wildflowers host beneficial insects. What are beneficial insects ? Lets start with insects in general 99% of all insects are not bad for us or our garden. Even spiders play a role in protecting your home and garden from invaders. A small amount of insects are damaging to our gardens and they in general focus on just one type of plant. In other words squash bugs love plants in the squash family, but you won't see them on tomatoes or anything else. Many of the other 99% of the insects are what we call beneficial's. In other words they feed on the bad bugs. So each time we use any pesticide be it conventional or organic you run the risk of killing as many beneficial's as you do the bad bugs. The use of pesticides and the stripping down of native habitats with grass and parking lots has reduced the population of beneficial's. These beneficial's need the same things we do to survive air, food, water, and shelter. Native plants so its time to think about creating a balanced urban ecosystem, and of course we can only hope farmers do the same. The good news is that more and more farmers are. First off it is a little complex but well worth it. There will be some pain as you make the change. First of all you are going to have to trust the plan. Early on you will be hand picking bugs off and maybe suffering more crop damage then you are comfortable with. Remember those bad bugs are also part of what attracts the good bugs to the garden. Oh which brings up another point you have to learn to live with some of those bad guys because they are food for the good guys, but trust me the population will be low. Lets get started by remembering your yard and garden are one big ecosystem what you do in your yard affects your garden. 1. Plan on planting 25%or more of your yard in native wildflowers, trees and shrubs. Native our best because the are already adapted to the area, which means less water, and fertilizer. These plants will provide food for the beneficial's in the form of pollen and nectar. Many of the non native plants have been bred for showiness but they provide less pollen and nectar. The key is to make sure to have something blooming all season long. This takes some planning. A couple great places to start are Cardno/JFNew and the Xerces Society Its worth downloading this Fact Sheet from the Xerces Society 2. Don't clean-up too much. Mulch, brush, and leaf litter are great places for beneficial's to hang out so maybe leave a brush pile around, and some leaves. Many insects make their homes in the soil so some bare patches of loose soil will also help. 3. Provide water. Take a bird bath fill it with sand and rocks and keep it full of water so the sand and rocks stay wet. Create some areas where water can pool. 4. Make a shelter. This can be done in several ways. Build a insect hotel this can be done with materials you find even pallets. Its all about building nooks and crannies for insects to live. So as you start planning your Spring start making some long lasting changes, start building your own Urban Ecosystem.
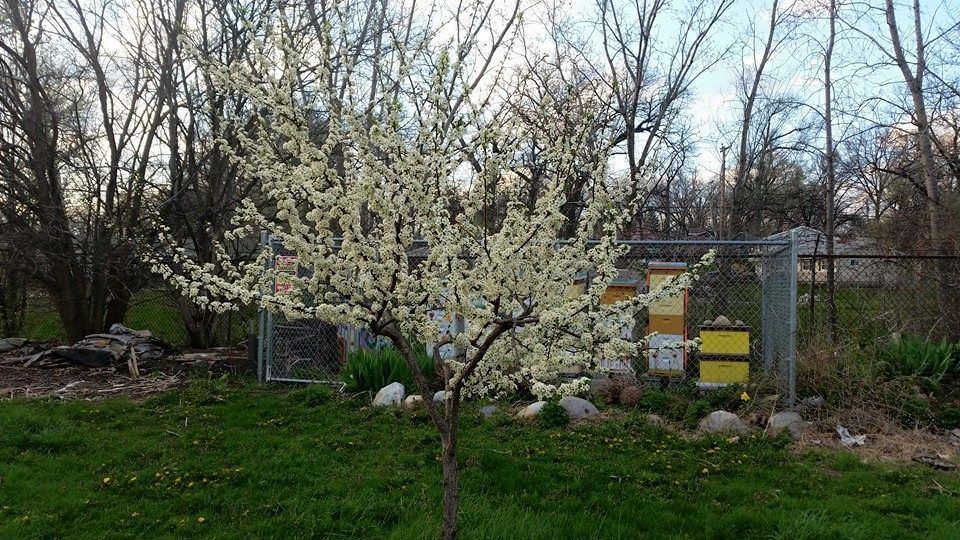
 After our Beekeeper won the 1st place at the State Beekeeping Competition I ask Tim so what's next ? He said " Nationals on Baton Rouge but I can't afford to go" At that point I decided we need to get Tim to nationals. Not just because we have awesome to represent South Bend with, but Tim is a special kind of Beekeeper and really needed to go. So I decided to run a fundraiser, and 53 wonderful people donated enough money for Tim to go to Nationals. Better yet thanks to a donation by a local company Lebermuth and a little budgeting we were able to take Steve with Peace Bees who teaches our beekeeping classes. The trip to Baton Rouge started off a little scary because we started driving on the first day of the monster snow storm, and were worried we would not make it in time to enter our Honey from the Hood in the competition. But after one day of crazy driving conditions, and one nice day we made it.
 In 2015 we are planning another mini food forest using a little different model. Last year's mini food forest was designed to look very natural, with clover and low growing plants for ground cover. Our next plan is to grow an edible gathering area for the neighbors. It will feature seating, a shelter/bus stop, and, of course, edible landscape. The Neighborhood Gateway Project's concept is to make the garden more welcoming to the neighbors across the street that can walk over and visit. It sits right on the bus line, so it can double as a bus stop. It will have a small garden area, several permanent fruit trees and berry bushes. We are referring to it as the Gateway because, as you pass through the shelter, a path will lead under a grape arbor and direct people to the larger, open garden. Thanks to a grant fromMemorial Community Health Enhancement, (supporting this, more welcome attractions, and the Youth Camp) the project will start early spring 2015!
By Sara Lowe
At the Growing Summit this past March, I led a group of yardeners in a discussion about being revolutionaries by growing our own food. The virtues of yardening are empowerment and economical independence. By growing our own food, we have freedom of choice in what we eat and how it’s grown. Joel Salatin, a revolutionary farmer himself, said that “a community that feeds itself is free.” We are free, as the Growing Summit imparted, when we make deliberate choices of eating food that is grown by our own hands or by farmers who live in our community. The Growing Summit included discussion not only about growing our own food, but also to that of food produced by local farmers. The booths, speakers, and even the hosts of the event, Unity Gardens, were there to persuade us as a community, to feed ourselves. A community that feeds itself buys from its own producers. The buyers know the people who produce, or can easily be connected to them easily. We can ask about the methods used to grow the food and then make the most informed decisions about what we eat. The community that feeds itself is free from outside economic support because the money it spends on food stays in that local economy. If the average family’s food bill is $100 per week, that family would spend $5,200 per year. If that family shifted its food spending to locally produced food by 20%, $1,040 would stay in the local economy. If 50%, $2,600; 75%, $3,900; 90%, $4,680 per year. If just 500 families spent 90% of their yearly food budget on locally produced food, those families would keep $2,340,000 in the local economy every year. A community that feeds itself is free from need when it supports itself through community gardens. Organizations like Unity Gardens supports the community through the free food it offers. Communities that work together to support one another in this way bond together and grow together. Communities that grow food in communal gardens have seen a decrease in rates of robberies and thefts. A community that grows its own food, one of our most basic needs, is free to determine what it eats, how that food is grown, and ultimately, the quality of life of everyone who lives within it. The Growing Summit is held each year. Its growth in attendance and widening breadth of topics relevant to building healthy communities is an encouraging sign that his community is catching on quickly to those benefits of controlling its own food source. 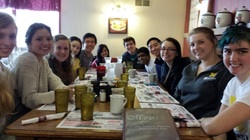 Thirteen diverse and (overly) excited University of Michigan students embark on their Spring Break volunteer trip at the Unity Gardens in Southbend Indiana. Imagine this: two (exceptionally ancient) minivans packed to the brim with caffeinated kids and excessive luggage with custom throwback CDs. Sounds fun right? It gets better. Instead of a quick run to a drive-thru they end up taking up a whole room at Marjo’s All Day Breakfast Diner. And that was just the beginning of the adventure! Our hotel ended up being a small palace complete with Starbucks in the lobby, fluffy beds, glass elevators, and a suspiciously murky hot tub. We didn’t get too comfy though, because we had to meet our gracious hosts Sara and Mitch at the Unity Gardens! We came armed with parkas, snow boots and hats, expecting to work in the polar vortex of South Bend Indiana, at Unity Gardens. We were greeted by an informative PowerPoint explaining how the gardens grow more than food; they help sustain a community. We also learned our first task would be painting bee homes! The next day, our “bee boxes” range from Picasso masterpieces to shameless stencils. During lunch, we were treated to a presentation on how to raise urban chickens. We all want to adopt several now!! Excited to see what tomorrow has in store….. Until then! Caty Raupp |
ContributorsWe love to feature blogs from all of the members of our team, including core staff, interns, volunteers, and others. We hope you enjoy the stories and find the information useful! Archives
January 2023
Categories |


 RSS Feed
AddressLaSalle Square
3701 Prast Blvd. South Bend, IN. 46628 |
Hours
Garden: always Welcome Center Mon-Sun: 9am-7:30pm |
Telephone574-222-2266
After Hours: 574-315-4361 |
Unity Gardens
PO Box 10022 South Bend, IN. 46680 |