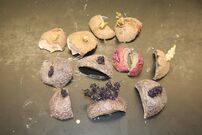
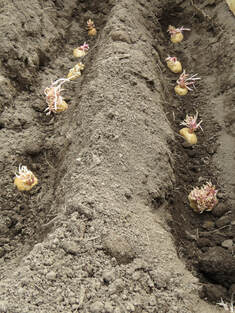
• Home
  • About
  • Fundraisers
  • Accessible Garden
  • CSA
  • Events
  • Unity Projects
  • Resources
  • Our Team
  • Blog
  • Products
  • In The News
  • Gallery
  • Volunteers
Unity Gardens Inc.
  • Home
  • About
  • Fundraisers
  • Accessible Garden
  • CSA
  • Events
  • Unity Projects
  • Resources
  • Our Team
  • Blog
  • Products
  • In The News
  • Gallery
  • Volunteers

Lending a Helping Hand

6/11/2020

4 Comments

 
Picture

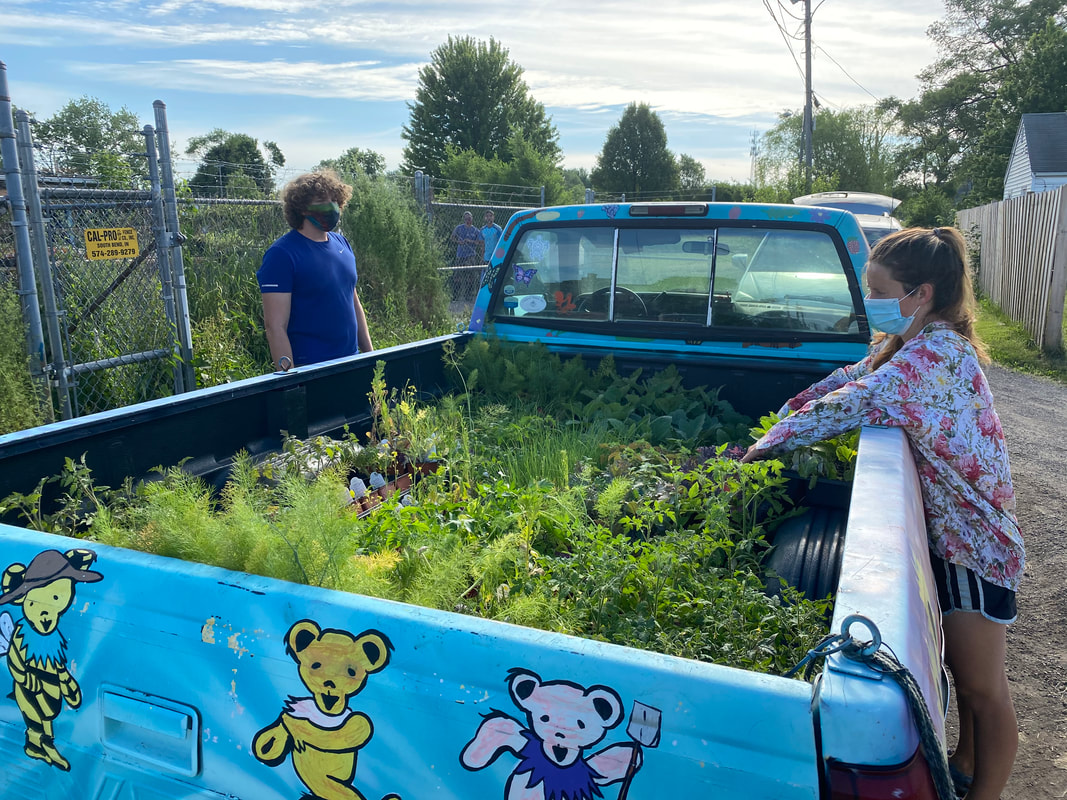
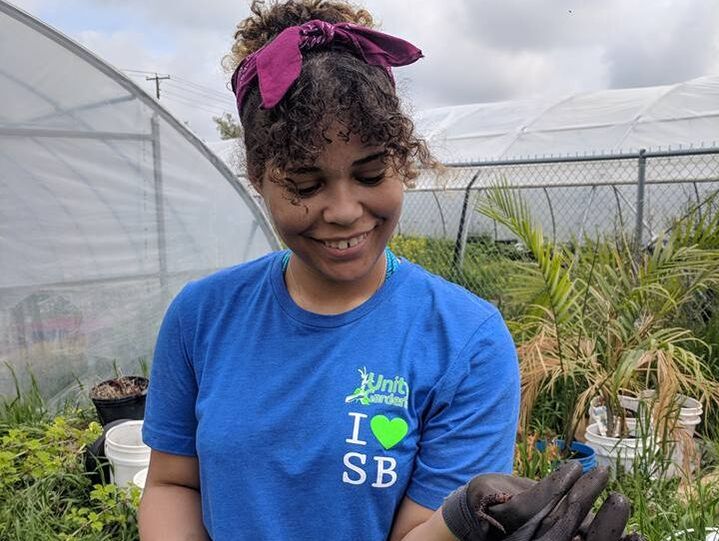
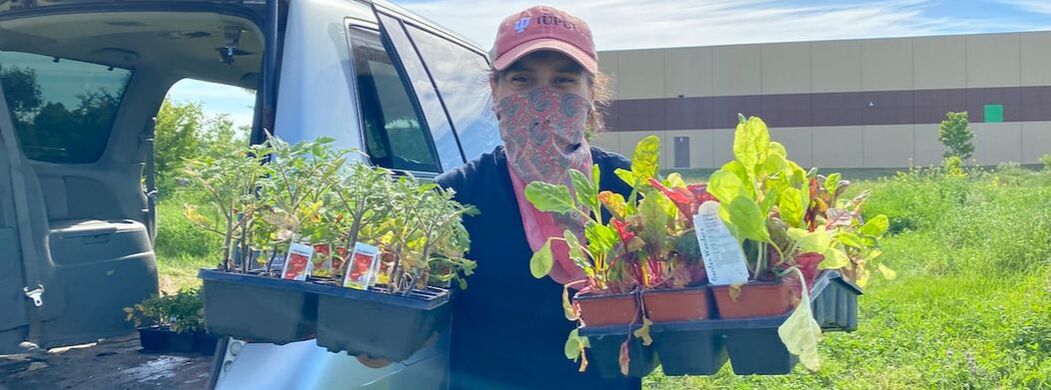
A volunteer helping unload the donated plants from Martin's Greenhouse.

For the past few years, Martin’s Greenhouse and Nursery, 3614 W. Western Ave., South Bend, has donated hundreds of plants to the Unity Gardens. Their generosity helps the many Unity Gardens in each neighborhood. 

Community engagement is what founded Martin’s Greenhouse in 1911. For more than a hundred years, the family-owned business has provided for customers all around the Michiana area, and even some from Indianapolis, Fort Wayne, Grand Rapids and Chicago. Their once community greenhouse has spread out not just location-wise, but also through generations.

“We have grandmothers, their daughters, their daughters’ daughters come in year after year after year,” said Allen Neblung, Co-owner of Martin’s Greenhouse. “Three generations come in and we get a lot of people come in and say ‘my grandmother used to shop here.’”

Neblung married into the business, with his wife being 5th generation of the family business. Jean Martin-Neblung and her husband enjoy donating to the Unity Gardens because they know the impact the gardens have on communities.
​
“It's a very well run organization,” said Neblung. “Sara [Stewart] and Mitch [Yaciw] do an amazing job of getting community involvement in their classes. Everything they do educational wise is to get people into gardening, which is great. We've always had a policy of every kid that comes into the greenhouse gets a free flower or plant because we want to see the kids getting involved.”
We offer the best product at the fairest price.
Picture
The Unity Gardens couldn’t be more appreciative of the donations from Martin’s Greenhouse. Even though the Greenhouse will not be opened until the Spring of 2021, we would still like to express how beneficial they are to this community.

“We offer the best product at the fairest price,” said Neblung. 

But it isn’t just their prices, it’s their customer service that attracts more and more customers.

“We attempt to carry out every customer's order to their car to make it simpler. We treat them all like they would like to be treated.”
​

Their commitment to helping others should not go unnoticed. We hope to continue lending a hand to communities alongside Martin’s Greenhouse for more years to come. After all, they do have a hundred years on us.

Picture

Author

Kayla Jackson, Unity Gardens Communications Manager.
Contact: kaylamj019@gmail.com

4 Comments

Spring Buzz

6/13/2019

2 Comments

 
Picture
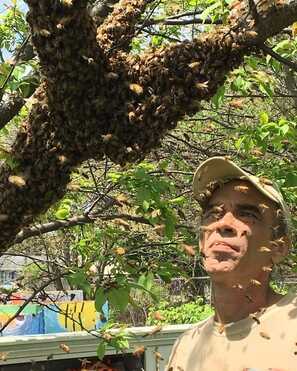
​Bee Swarm at the Garden!
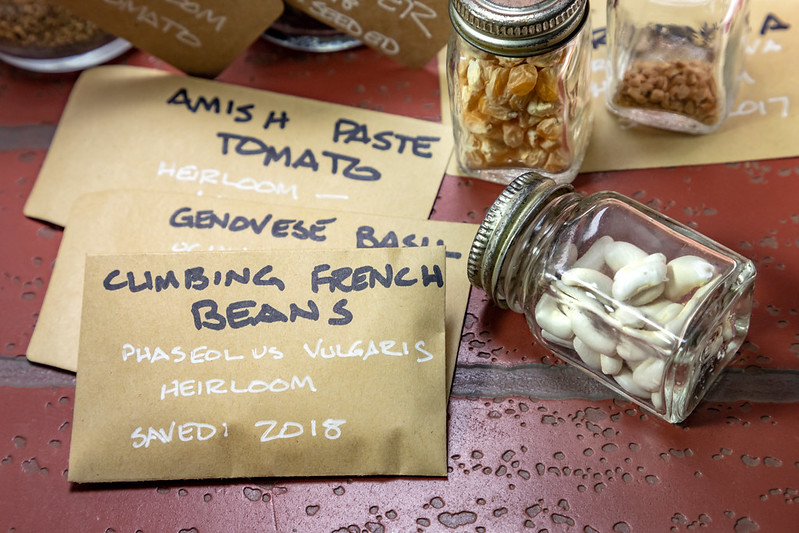
By Carter DeJong
Garden Intern

Spring has sprung and the bees at Unity Gardens have begun working hard to bring you Honey from the Hood and your favorite beeswax candles and hand-balms. Recently, our bees have been “swarming”. This occurs when the space inside the hive becomes too limited for the bees and they must find a more suitable area to live.
To initiate a swarm, the older queen will leave the hive with about 50 to 60 percent of the worker bees so that they can start a new hive. They will gather at a nearby area to swarm. In this case it was an apple tree branch in the garden. Next, scout bees will be sent to search for a suitable place for a new hive. Once the drone bees report back, the queen will then lead them to the new area.
Swarming is also the primary method bees use to reproduce. While swarming, the bees are not very aggressive as they are not defending their hive and they are full of honey.
In the picture shown above, our beekeeper, Tim Ives of Ives Hives, looks for queen bees that can be used to start new hives. From this particular swarm, Tim found five or six queens.
All of the bees at Unity Gardens are raised without giving them any sugar. Tim’s method involves leaving enough honey for the bees to eat so that they do not need to be fed anything else. Most commercial beekeepers feed their bees sugar so that they can get more honey from them. Unity Gardens Honey from the Hood is made completely naturally and is not pasteurized. Currently it is available in three flavors: fall blend, raspberry blossom, and the award winning South Bend Wildflower. Honey from the Hood is sold at the South Bend and Mishawaka farmers markets.
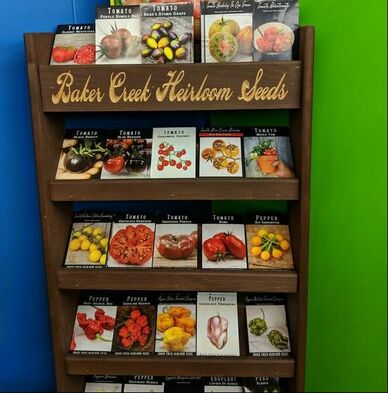
2 Comments

Is A Seed Just A Seed

1/17/2019

1 Comment

 
PictureOur Baker Creek Seeds At The Market


Its January in Indiana and you are snowed in. What do you do? Well, if you love gardening, it's a great time to study seed catalogs. There are some things to think about when buying seeds: Heirloom vs Hybrid, Organic vs Non-Organic and of course GMO's. Here are some informational tips: 
  • Open-pollination is when pollination occurs by insect, bird, wind, humans, or other natural mechanisms. Because there are no restrictions on the flow of pollen between individuals, open-pollinated plants are more genetically diverse. This can cause a greater amount of variation within plant populations, which allows plants to slowly adapt to local growing conditions and climate year-to-year. As long as pollen is not shared between different varieties within the same species, then the seed produced will remain true-to-type year after year.
  • An heirloom variety is a plant variety that has a history of being passed down within a family or community, similar to the generational sharing of heirloom jewelry or furniture. An heirloom variety must be open-pollinated, but not all open-pollinated plants are heirlooms. While some companies create heirloom labels based on dates (such as a variety that is more than 50 years old), Seed Savers Exchange identifies heirlooms by verifying and documenting the generational history of preserving and passing on the seed.
  • Hybridization is a controlled method of pollination in which the pollen of two different species or varieties is crossed by human intervention. Hybridization can occur naturally through random crosses, but commercially available hybridized seed, often labeled as F1, is deliberately created to breed a desired trait. The first generation of a hybridized plant cross also tends to grow better and produce higher yields than the parent varieties due to a phenomenon called 'hybrid vigor'. However, any seed produced by F1 plants is genetically unstable and cannot be saved for use in following years. Not only will the plants not be true-to-type, but they will be considerably less vigorous. Gardeners who use hybrid plant varieties must purchase new seed every year. Hybrid seeds can be stabilized, becoming open-pollinated varieties, by growing, selecting, and saving the seed over many years.
  • GMOs or more accurately, varieties created using 'recombinant DNA technology', can be either hybrids or open pollinated varieties. Recombinant DNA technology is the ability to combine DNA molecules from different sources into one molecule in a test tube. The inserted DNA may come from related or unrelated species, or created in a laboratory. GMOs are not permitted in organic farming systems. 
  • Organic seeds: Organic seeds are regulated by the USDA and must be grown in accordance with USDA guidelines on and organic farm. Both Heirlooms and Hybrids can be organic. 
  • Non-organic seeds can be grown on a farm not using organic methods. And in some cases the seeds can be treated with a fungicide. 
There is quite a bit of information to consider when buying seeds. There are advantages to growing both Heirlooms and Hybrids. Consider saving Heirloom seeds and saving our diverse plant heritage.

1 Comment

Something I Should Have Did Last Summer

1/17/2019

0 Comments

 
Picture
Sometimes I find myself doing tasks in the winter that would have been much easier in the summer. Cleaning trays is one of them. It is just like leaving dirty laundry on the floor. You would not have to go back for it if you had put it in the hamper in the first place. 
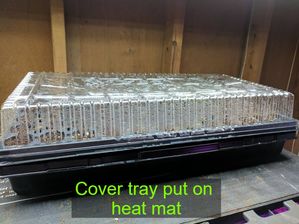
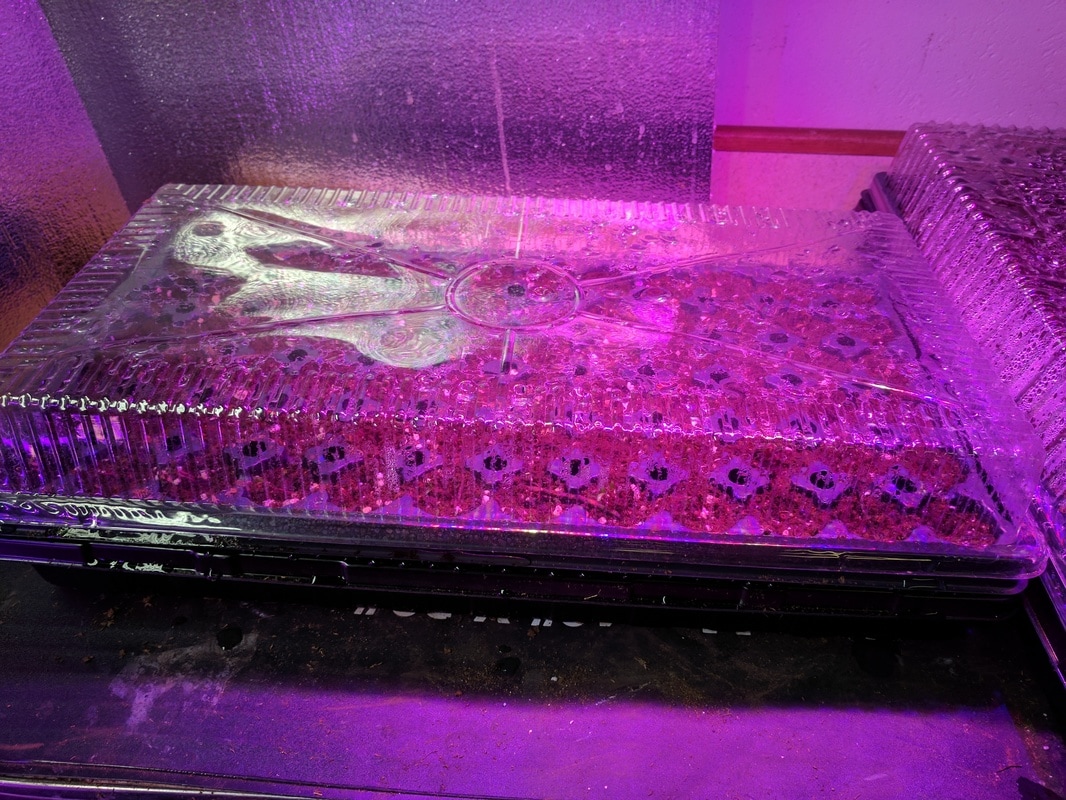
Ok, back to real life. It is great to recycle old seed starting trays, but they need to be sterile. Old trays can harbor pathogens that can dampen off young seedlings. 
Here is what you "should" do. 
After you use the trays initially and transplant seedlings into your garden, clean your trays using the following steps: 
1. Shake out loose dirt.
2. Rinse off with garden hose. 
3. Wash with 10% bleach solution or soapy water. 
(some gardeners soak trays in a tote or kiddie pool of bleach water) 
4. Rinse 
5. Let trays completely dry in the sun. 
6. Store in plastic garbage bags until ready to use. 

Whenever you choose to clean your trays, your seedlings will be glad you did. 
​

0 Comments

Winter Apple Tree Pruning

1/17/2019

51 Comments

 
Picture
​Pruning has never been one of my favorite things. I am always afraid of doing permanent damage. In reality, apple trees are tough and very forgiving. The best start to pruning is good-quality sharp and sterile pruning tools. Hand held bypass pruners, long handle lopping shears, and a pruning saw are some great ones. A good tip: if you have a battery powered reciprocating saw, it will do the job on branches that are too big for the loppers. When cutting, you want a clean cut without smashing the wood.

When to Prune Apple Trees
Summer pruning of apples helps encourage fruiting and flowering, but winter pruning is essential for controlling shape and vigor. Winter pruning starts when the trees go dormant and lasts until early spring before they start to bud.
1. Remove the 3 "D's".
That’s diseased, dying and dead wood. If the wood shows obvious signs of any malady, amputate it. Make the cut into healthy wood to ensure the problem doesn’t spread.
2. Remove crossing branches.
If two branches cross, they will rub away the bark and potentially provide an entry point for disease. They will also make it harder for air to circulate, and make harvesting more awkward. Try to imagine how the branches will look when weighed down with leaves and fruits; will they rub against a branch below? If you spot two branches that are likely to cross in the future, prune one of them out now. It’s an easier job to make these cuts while they’re still small. Think of any inward-pointing branches as crossing ones, and remove.
3. Make the biggest cuts first.
You can spend an awful lot of time removing a small dead twig here and a spindly inward-turning shoot there, but when thinking about removing a small branch it’s a good idea to trace it back to the trunk to see if there are other problems. You might find that it crosses with another further back and that it, therefore, should be cut out closer to the trunk.
4. Make clean cuts.
Use clean, sharp pruning tools. If you’re doing a lot of pruning you may need to stop occasionally and re-sharpen the blade. High-quality tools will retain an edge for much longer. Always cut just-above a healthy outward-facing bud. This is where next year’s growth will spring from. If you need to remove a whole branch, make your cut close to – but not into – the main branch or trunk. Look for the raised ‘collar’ where the branch joins and cut flush with that.
When using a saw to prune larger branches, first make a shallow undercut before sawing through from above. That way if the branch breaks off as you’re cutting it, it won’t rip off a long section of the tree’s protective bark.
Prune very thick or long limbs in sections. It may seem like more work but it’s much safer, and it’s less likely to cause damage if the branch breaks under its own weight as you’re cutting.
5. Take your time.
Keep stepping back and checking the overall shape of the canopy to make sure it looks balanced before making your next cut. A little change in perspective can make a big difference!

Picture
51 Comments

Indoor Seed Starting

1/15/2017

4 Comments

 
Picture


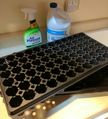
Indoor seed starting is a great way to get a head start on your Spring gardening. It can also bring lots of frustration with leggy plants, poor root systems, bad germination, and damping off. I have a few tips that have helped me become a master at indoor seed starting. 
1. Order good quality seeds, store in cool dry place. 
2. Don't jump the gun and plant to early. This results in plants that are root bound, leggy, and too big for transplant. Know our last frost date ( I go with May 15th ) and read the seed packet to see how many weeks before that to start seeds. or find a nice chart with planting dates. 
3. Use a good quality I use Promix it works great for me you can find it a many professional growing stores. 
4. Use new or clean seed starting trays. If you reuse old trays clean them well with bleach water and let them dry before using. This will insure any residual fungus is removed from previous growth. 
5. Seeds germinate best in warm soil. A seed starting heating mat . 
6. I like good quality seed trays. I like the with 3 inch deep cells. Also good heavy duty seed bottom trays. Also clear plastic seed tray covers. 

Lets get started. 
1. Fill seed tray cells to top with soil. Crush up and large soil chunks. 
2. place seeds in cells at depth recommended on seed pack. 
3. fill bottom tray 1/4 to 1/2 full with very hot water from sink. This will take a little trial and error depending on size of cells and type of soil you want the water to wick up to top of cell and keep seeds moist until they sprout. Hot water at first will speed up germination. 
4. Put on heat mat, and cover with plastic dome to keep moisture & heat in 
5. Pull cover off as soon as seedlings appear. 
6. Key to healthy seedlings is to always water from bottom. Let bottom tray dry out before watering, then do not over water. Water enough in bottom to soak part way up soil, keep top of soil dry. Make sure tray is level so it gets watered evenly. 
7. Light on new seedlings is important. If using grow lights 16 to 18 hours. If using window light try to get as much light as possible and rotate tray so it gets even light. 
​Happy Growing 

Picture
Picture
Picture
Picture
Picture
Picture
Picture
4 Comments

Winter Sowing

1/1/2017

1 Comment

 
If your are missing being out in the garden here is something fun to do that keeps you in touch with your green thumb. Even though the the ground is frozen you can get an early start on your garden. When I first heard of Winter Seed Sowing it was pretty simple. You wait until early January to do this. You take a old Kiddie pool poke some holes in the bottom, fill the bottom with about 2" of soil throw some old leftover seeds in water, and cover with clear plastic. You leave it out in the back yard and the concept is after freezing the seeds will come up when they are supposed to. I have done it for fun in the past and it worked Ok for what it was. This year I am going to be a little more organized in the way I do my winter seed sowing. I am using milk jugs as mini greenhouses to sow in. As a rule of thumb you can do this with any seed that will grow in your zone.  sometimes seeds can also sprout during some freak warm spell between weeks of frigid conditions. This is not a problem for perennials and hardy annuals. But if this happens to tender annuals you may need to cover them with a blanket on chilly nights. Hardy plants to sow in January and February are perennials and vegetables like Spinach,Kale,Brussels sprouts, Peas, Broccoli, Thyme, Sage, Oregano, and Cilantro. In March
Tender Annuals, Vegetables & Herbs Lettuce, Bok Choy, Beets, Carrots, Basil,and Parsley. In April Tomatoes, Eggplant and Peppers. Check out these simple instructions below. Use good weed free soil, and once the plants are large enough take them apart and transplant into your garden. 
​Happy Gardening 


Picture
1 Comment

Yellow Jacket or Honey Bee 

8/22/2016

1 Comment

 
PicturePhoto by http://www.about-bees.com/

This is the time of the year that our ever peaceful Honey Bees take a bad wrap for their not so friendly cousins the Yellowjacket Wasp. There are some very clear differences to look for. 

 Yellowjacket Wasps are skinny and shiny (no noticeable hairs).  Eat other insects (soft bodied caterpillars, and spiders) and are beneficial predators.  Wasps are carnivores and may be attracted to meat at your picnic. They also are attracted to sweet soft drinks.

​Honey Bees are fatter, and appear fuzzy or hairy.  Bees eat pollen and nectar from flowers and are beneficial pollinators.  Bees do not eat meat and are not attracted to your picnic. They generally are not attracted to soft drinks

Yellowjackets are one type of wasp.
They live in a social colony and the nest looks like a greyish paper carton. 
Yellowjackets usually nest underground in an abandoned rodent burrow and are readily seen flying in and out, especially if you run your lawn mower over the opening of the nest. If they are living in the wall of a house, you will not see the paper nest, but you will see them flying in and out.
 Yellowjackets have an annual colony, meaning the entire colony of wasps will die off after two hard frosts. Colony populations will range from a few dozen to a few hundred individuals. Only new queens survive the winter by hibernating underground. The queens will establish new nests in spring and will not reuse the old paper nest.
Yellowjackets have a smooth stinger, which means they can sting multiple times, and do not die after stinging. There is no stinger left behind at the stinging site.
Yellowjackets do not produce or store honey

Honey bees are one type of bee. They are orange-yellow, gray or brown and black banded, and fuzzy. They are also social and the nest is constructed of beeswax.
Honey bees nest in a beehive, a cavity of a tree, or sometimes in the wall of a house, where they can be seen flying in and out. They do not nest in a hole in the ground.
Honey bees form perennial colonies, meaning the entire colony of bees can survive the winter, clustering in the nest and producing heat by consuming stored honey. Honey bee colonies have much larger populations, often approaching 30,000+ individuals at the height of the summer season.  Honey bees can sting only once and die after stinging. The stinger and poison sac are often seen left in the skin at the sting site.
Honey bees are the only type of bee that collects large amounts of nectar and pollen from flowers to store in the nest, to use as food during the colder times of the year. 

So do Honey bees or Yellowjackets in your home?
If you have yellowjackets, rest assured they will be gone after two hard frosts. If they are not bothering you, ask yourself if you can live with them and appreciate them as beneficial predators. If you cannot live with them, you may need to exterminate them. If it is late summer or fall, keep in mind the colony has been growing there all season, and if they have not bothered you, they likely won’t start. If you have a honey bee colony nesting in the wall of your house, ask yourself if you can live with them and appreciate that they are beneficial pollinators. If you cannot live with them, you will need to try to locate a willing beekeeper and contractor for removal options. In most cases, there is no easy or inexpensive solution to removing a honey bee colony from a house, as de-construction is necessary to open up the wall cavity to remove the bees and wax combs. If it has been determined that the honey bees must be removed, the best time to do so is often in late winter or early spring. The reason for this is that by that time of the year, the bee population is often at its lowest point, meaning fewer bees to deal with. Also, much of the stored honey will have been consumed by the bees over winter, so there will be less honey in the combs to deal with. Often the bee colony will die over the winter, usually due to insufficient population to maintain adequate temperature for the bees to survive; insufficient reserves of honey, so the colony starves to death over winter; or the colony succumbs to parasitic mites. In all of these cases, it is much easier to deal with the remaining bee less combs, as the bees will have perished, making removal much easier (no stinging insects to protect the nest!).
 It is not a good idea to just plug the entrance hole of an active honey bee colony in this type of situation. Once the bees can’t get out and die in the wall, there will no longer be temperature regulation of the nest cavity. This in time may result in the melting of the honey comb, and the leakage of honey down into the wall, which will attract other insects and possibly rodents. There will also be developing brood or baby bees in the comb which will also die, leading to bad odors and attraction of other scavenger insects and pests. 

Some tips to keep Yellowjackets away from you house or picnic. Don't leave rotten fruit or meat outside. Keep garbage can lids on and keep cans clean inside and out, and bag garbage. Wipe down picnic tables after eating on them so Yellowjackets are not attracted to them. 

1 Comment

Gardening With Native Beneficial Insects

1/6/2016

5 Comments

 
Picture


For years " Gardening 101 " meant Rototill your garden, rake it out, plant rows of your favorite vegetables. The next year repeat the same thing all over again. Farmers do the same thing on a larger scale. As urban area grew we removed the native flora and replaced it with grass which in my book has no value to our ecosystem but its pretty. We cut down native trees and imported flowering trees from other countries that just did not belong. The result was a shift in the balance of our ecosystem. Native trees and wildflowers host beneficial insects. What are beneficial insects ? Lets start with insects in general 99% of all insects are not bad for us or our garden. Even spiders play a role in protecting your home and garden from invaders. A small amount of insects are damaging to our gardens and they in general focus on just one type of plant. In other words squash bugs love plants in the squash family, but you won't see them on tomatoes or anything else. Many of the other 99% of the insects are what we call beneficial's. In other words they feed on the bad bugs. So each time we use any pesticide be it conventional or organic you run the risk of killing as many beneficial's as you do the bad bugs. The use of pesticides and the stripping down of native habitats with grass and parking lots has reduced the population of beneficial's.
      These beneficial's need the same things we do to survive air, food, water, and shelter. Native plants so its time to think about creating a balanced urban ecosystem, and of course we can only hope farmers do the same. The good news is that more and more farmers are. 
      First off it is a little complex but well worth it. There will be some pain as you make the change. First of all you are going to have to trust the plan. Early on you will be hand picking bugs off and maybe suffering more  crop damage then you are comfortable with.  Remember those bad bugs are also part of what attracts the good bugs to the garden. Oh which brings up another point you have to learn to live with some of those bad guys because they are food for the good guys, but trust me the population will be low. 

Lets get started by remembering your yard and garden are one big ecosystem what you do in your yard affects your garden. 

1. Plan on planting 25%or more of your yard in native wildflowers, trees and shrubs. Native our best because the are already adapted to the area, which means less water, and fertilizer. These plants will provide food for the beneficial's in the form of pollen and nectar. Many of the non native plants have been bred for showiness but they provide less pollen and nectar. The key is to make sure to have something blooming all season long. This takes some planning. A couple great places to start are Cardno/JFNew  and the Xerces Society  Its worth downloading this Fact Sheet from the Xerces Society 
2. Don't clean-up too much. Mulch, brush, and leaf litter are great places for beneficial's to hang out so maybe leave a brush pile around, and some leaves. Many insects make their homes in the soil so some bare patches of loose soil will also help. 
3. Provide water. Take a bird bath fill it with sand and rocks and keep it full of water so the sand and rocks stay wet. Create some areas where water can pool. 
4. Make a shelter. This can be done in several ways. Build a insect hotel this can be done with materials you find even pallets. Its all about building nooks and crannies for insects to live. 

So as you start planning your Spring start making some long lasting changes, start building your own Urban Ecosystem. 


5 Comments

Putting Your Garden To Bed

9/21/2015

2 Comments

 
Picture
Picture
Clean Up !
Picture
Picture
Cover Up !
Picture
Keep the leaves in.
Picture
Prune out dead canes.
Picture
Protecting Rosemary Plant
Picture
Protect Your Trees
Picture
Picture
Fall comes every year and for us gardeners it can be a tough time of year as the plants start to fade. For me its the start of a new beginning creating a canvas in which you future garden will be painted.
Fall is the time to build up your garden for the upcoming season. 
Where to start. 
Walk Your Garden: I talk about walking your garden all season long to keep issues in check so before you clean-up make one final walk through. Document how you feel your garden preformed, what changes you would make, and what worked well. Also while its fresh in your mind write down some plans for next year. Now you are ready to get started. 
Clean-up: There are some things you want to keep and some you want to leave. Any areas where you have had an insect infestation or disease you want to remove all the plants and plant debris. Bag them and remove them or burn them. I always assume that Tomatoes and Squash have issues so I remove them. 
Root crops can stay in the ground all winter. During a mild winter you can harvest all winter or wait until Spring and harvest. 
There are 2 schools of thought on what to do  with the rest of your garden space. 
The traditional method is to pull all the annual plants, Beans, Peppers corn etc. and lightly rototill or hand turn soil ( do not work soil more then 4" down) rake it out and then cover with leaves and or manure. If you have a really weedy area you can cover it with black plastic to kill off the weeds. If you have wet heavy leaves or grass clippings you can put cardboard under the leaves. Beware windy weather. If your garden does not have a fence around it you can buy some inexpensive construction fence to keep leaves from blowing away. In the Spring you can rake the top layer of leaves off reveling a rich day soil layer under to plant in. You can put overwintered leaves between your freshly planted rows or put them in your compost pile. 

Method # 2 has us leaving the plants in place over the winter. There is a fungus amongus so to speak. Mycorrhiza(“root fungus”.) resides in a healthy garden. Whether fungus makes you think of yellow toenails or mushrooms on a pizza, most don’t realize the impact they do and can have on all life on Earth. They are an amazing life-form that we are just scratching the surface of their potential. One use that commercial growers and nurseries have known for a while but is now starting to trickle to us gardener is the symbiotic relationship mycorrhizal fungi has with plants. So the idea of leaving roots in place over winter makes sense. Another concept is to insert more perennial plants in the garden to host this healthy garden fungus. The idea is to still remove any diseased or infested plants but leave the others in place and then cover with leaves and or manure. The bonus is some roots will rot, and some will host the Mycorrhiza. The plants left standing will also hold leaves in place. In the Spring you can rake out the garden cleaning up the bigger plants and roots and getting ready to plant. 
Either way you go adding more organic material and covering up your garden to deter early weeds will make Spring planting go better. 
What to do with perennials: Many plants will over winter in the garden. Plants like Sage, Thyme, Oregano, Lemon Balm, Tarragon and Chives need no real care and they will come back in the Spring. Rosemary & Lavender fair well during a mild winter, but I like to pot mine up and put them in my greenhouse or enclosed porch. Do not water them very much because unless you are giving them heat and light its best to let them go dormant. If you try to leave them out for the winter try covering them with leaves or straw. 
Trees: As you grow your orchard or just increase your tree canopy its important to protect your tree trunks. I used to roll the dice and hope that my trees did not get chewed on by rabbits or deer over the winter, but then a few years back when we had a really hard winter the rabbits took the bark off several tree and killed them. Yep I knew better. So I now go to Menards and buy these fancy tree trunk covers made from corragated pipe. There are several ways to protect your young tree trunks. The key is that air needs to flow around tree, water can't stand around trunck, and be sure it does not restrict growth. 
Berries: 
In early to midfall, prune summer-bearing raspberries, leaving six of the strongest brown canes for every 1 foot of your row.
Prune fall-bearing raspberries ruthlessly, moving them to the ground after they have borne fruit. New canes will come up in the spring. 
If in doubt wait until Spring and cut all the dead canes out and lightly mulch around the bushes. Of course wait long enough to make sure you are cutting just dead canes. 
Plant blackberries in the fall and mound up the soil around the canes to prevent hard frosts from heaving them out of the ground.
Cover strawberry beds with straw or hay.
Garden Odds and Ends:
1. Empty all your outdoor containers to keep them from cracking during the winter. Store them upside down.
2. A bucket or hanging basket hung in the toolshed is a great place to store hose nozzles and sprinkler attachments.
3. On a mild day, run your garden hose up over a railing or over the shed to remove all the water. Then roll it up and put it away.
4.Cover your compost pile with plastic or a thick layer of straw before snow falls. this will keep it active longer into the winter
5. Scrub down and put away your tools. Some folks oil their tools with vegetable oil or Beeswax to keep them from rusting. Winter is also a great time to get tools sharpened. 
** Just an FYI there is a great guy at The South Bend Farmers Market that sharpens tools. 

One more thing ! 
If you just can't let your garden go try some season extenders Focus on cool weather crops like Kale or Spinach trying to extend warm weather crops just does not work.. Just don't forget it does not rain under the season extender so keep it watered. 


2 Comments
<<Previous

    AuthorS

    Hi, my name is Mitch. I am the Unity Gardens Manager. I am a Purdue Master Gardener and teach many of the gardening classes. I also manage the LaSalle Square Garden, and maintain the website, blog and newsletter.

    And I'm Kayla Jackson, the Communications Manager for the Unity Gardens. I manage our social media, videos, blogs and all other forms of communications. I am a 2020 Ball State graduate with a degree in News Journalism and Telecommunications.


    For older stories check out our
    old blog .

    Archives

    June 2020
    June 2019
    January 2019
    January 2017
    August 2016
    January 2016
    September 2015
    August 2015
    December 2014
    May 2014
    March 2014
    February 2014
    January 2014
    December 2013
    September 2013
    August 2013
    July 2013
    June 2013
    May 2013
    April 2013
    January 2013
    December 2012
    November 2012

    Categories

    All
    Native Planting

    RSS Feed

Mailing Address                                     Main Garden
Unity Gardens                                        LaSalle Square 
PO Box 10022                                          3701 Prast Blvd 
South Bend IN. 46680                           South Bend IN 46628              
Office Phone # 574-222-2266
​Contact for Sara Stewart 
Ph: 574-315-4361   call or text message
e-mail
growunitygardens@yahoo.com     

                                         
  • Home
  • About
  • Fundraisers
  • Accessible Garden
  • CSA
  • Events
  • Unity Projects
  • Resources
  • Our Team
  • Blog
  • Products
  • In The News
  • Gallery
  • Volunteers